If you’re looking to add texture and visual interest to your home, brick tiles are a beautiful and easy solution.
This new form of “tile” is a popular option for many homeowners, but installing it can often present some challenges
Installing brick tiles requires patience and precision. From cutting the bricks evenly, to prepping the wall, and placing the tiles correctly – tiling your wall with bricks is an art. Take each step carefully and you will me marveling at your masterpiece for hours after.
Before you delve into your highly anticipated brick tile project, read this helpful guide that will show you how to install the perfect wall to enhance your curb appeal or living space.
Prepping Your Walls for Brick Tiles
Before you install new brick tiles, you’ll need to make sure the wall is clean and dry. Use a combo of soap and water and gently wipe walls down, allowing them to fully dry before you begin.
Any grease or residue on the walls can make it more difficult for the brick to adhere, so check carefully for any dirt, marks, and oil before application. You will use a quality brick mortar that helps the tile stick to the walls.
While the walls dry, create a “ledger” at the bottom of the wall that will ensure everything is level as you install the veneer. Using a level and a piece of wood, this ledger will provide you with a guide to ensure that everything is installed nice and straight.
You can remove the ledger once you get to the bottom of the wall, but it’s a great way to ensure your installation is even as you go.
How to Cut Thin Brick Tiles
Since brick tiles don’t use a full brick, you need to cut each individual brick into a thin layer for the application. Use a tile wet saw or a high-quality diamond blade grinder to cut each brick in half.
Cut all of your bricks in advance so you have a stockpile ready to install all at once. Pre-cutting everything to the same thickness at one time will ensure that the tile looks even.
When you cut the bricks before the install, you can just grab them as you go rather than having to cut each one individually. Always use protective eyewear when cutting bricks, and do it outside so you don’t damage anything indoors.
How do you Lay Brick Tile
Installing your thin brick tiles is like a puzzle, start with the edges and the rest will fall into place.
What Adhesive do you Use for Brick Slips?
For brick tiles, you want to use a cement based adhesive that is not water soluble when it dries. You spread the adhesive on the wall ad then stick the bricks, or you can put the adhesive onto the brick first, its up to you. But if you put it on the wall, you might wan to start working quickly, so this is maybe fore the more advanced bricklayers.
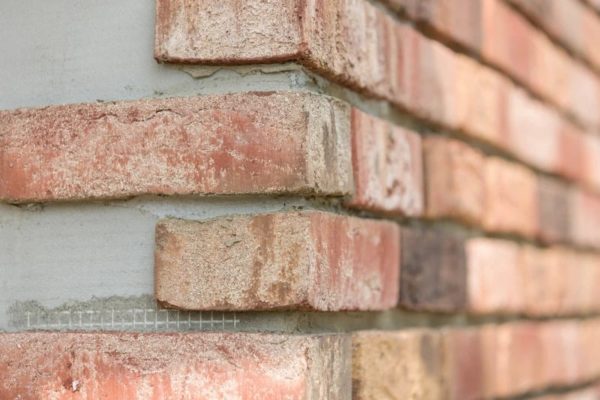
Start with the Corners
When you start the installing you brick tiles, begin at the bottom corner of the wall and use a notched trowel to spread the mastic over the surface. Press the brick firmly onto the outer edge of the lower corner of the wall.
As you continue upward, use a half brick, then alternate between a half and full brick as you go. This will start the familiar “brick pattern” that gives the wall that classic masonry look.
Beginning at the corner of the room makes it easier to work your way outward. You can always cut the last bricks to size as-needed once you reach the far side of the room against the wall.
Installing Rows of Brick Tiles
Once the corners are complete, you can begin installing each row of brick tile. Start the process about halfway up the wall, then go back down toward the bottom.
Continue to apply each tile row by row as you work your way up the wall. Make sure that every row you install is level using a four-foot level as you go.
If the bricks are uneven, you can easily adjust them as long as you do it quickly before the mastic sets. Use a thin strip of wood between each row to allow room for grout later. The thickness of the wood between rows is up to you, depending on how you want the final result to look.
The grout joints can be anywhere from 3/8 to 1/2-inch wide between the rows and each individual brick. Measure by eye to give your tile an authentic look that fits with your desired aesthetic.
Can I use Grout Between Brick Tiles
Once you’ve finished installing every brick, allow the mortar to dry for a minimum of 24 to 48 hours. This will ensure that the brick has completely adhered to the wall and it’s ready for the finishing touches.
Use a Portland cement mixture for your grout and make sure you follow the manufacturer’s instructions to mix it correctly. Squeeze the grout through a grout bag and apply it between the joints.
When you apply grout, do so slowly and in small increments at a time. Make sure you get in between every single brick and be sure to avoid any gaps or missed areas.
Smooth the grout lines using your finger and remove any excess. You can wipe the grout lines with a soft, moist towel to make sure it looks even. Remove any grout that gets on the bricks with a wet cloth and then buff it out until the surface looks clean.
Allow the grout to dry overnight. if you see any gaps the next day, you can easily add some more until every crevice is smooth and filled in.
Enhance Your Home with Brick Tiles
If you’re looking for something more rustic and warm, brick tiles are an excellent option to create a feature wall in the home. Follow this process and you’ll have an easy time adding this material to any space.
Always use quality diamond blades when cutting your brick for a nice, even cut. Take your time and make sure that every row is level so you’re happy with the finished product.
Whether you’re a professional bricklayer or a homeowner in need of the right tools, visit our website for our latest products and contact us with any questions so we can help you find the perfect blades and more.